In the last post we looked at how to get a wheel to fit the car when changing them and avoiding scrubbing or clashing with suspension. Once you’ve got those perfect rims your going to need some rubber to wrap them and this article once again steps into Robert Langdon’s shoes in a code deciphering jaunt through tyre description…
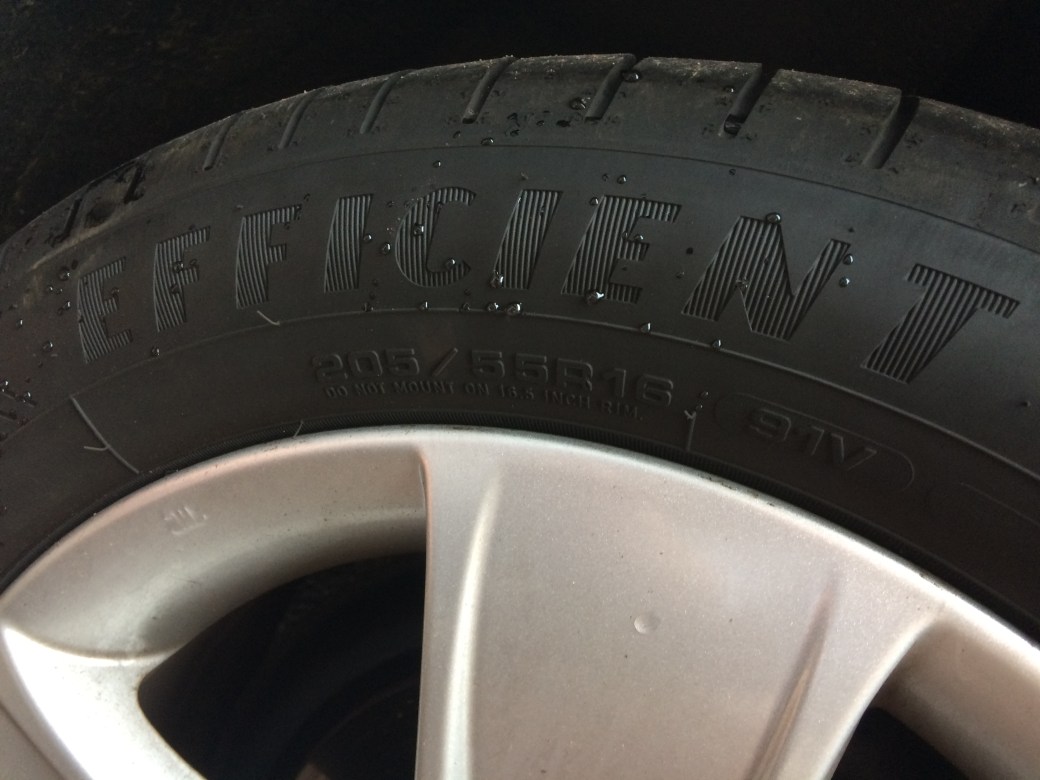
205/55 R 16 91V
Now there is a list of letters and numbers that would get a code and symbols expert aroused! Normally you’d just give the spotty kid at kwik fit that list and they’d put a matching tyre on your car, when changing wheels you need to change those numbers to suit!
Lets start with the simplest bits, the R stands for radial, that’s the way the tyre is made and pretty much all car tyres are made this way so you’ll almost only ever see that letter. 16 represents 16″ the size of the wheel the tyre is made for and should match your chosen wheels. So far so good and that was pretty painless.
91 is the load rating this is how much weight the tyre can carry and you need this to be the same or better when swapping your tyres. There is no point in going for hugely higher rated tyres though as it just doesn’t need it. You can find tyre rating tables around the internet and just for information 91 will take 615kg of load.

The V is the speed rating of the tyre, this is how fast the car it’s fitted to can go before it fails or has issues with keeping you on the road. Below is a table that gives a range of these so you knw what we’re looking at. You don’t need to improve these or change them when you change wheels but as you’ll most likely be getting into lower profile tyres they are likely to have been designed for sports cars and so the speed ratings and loads will be higher by the nature of the tyre.

The last digits are the 205/55 and this is where the maths comes in! Once again the joys of differing units comes into play and the 205 is the width of the tyre tread area in millimetres, this is to contrast with the inch width measurement of your wheels. Tyre width is often slightly wider than the wheels width and gives the usually ballooned appearance of a tyre. The above tyre is actually on my Skoda (the numbers on the side wall are easier to see so make for a better photo!) But if looking at the previous articles 7.5″ wheel width that is 190mm so a 195 or 200 tyre would likely be a good fit. As is the style for fitment cars though a narrower tyre can be used to get that ‘stretch’ look. Be aware that tyres aren’t meant to be fitted like this and so the degree to which this is done is upto you and what you can get a tyre shop to fit them for you!

That 55 number is where the real maths starts and where the real trickery of fitment starts to come into play. The overall diameter of your existing tyre is what impacts your speedometer reading. Changing the overall diameter will change the circumference and that impacts the distance travelled for every rotation that distance travelled per rotation is what will make your speedometer read over or under the speed your actually travelling. Please be aware whilst you may think a tiny difference in daimeter doesn’t make a big difference to the circumference it does your eye just can’t see it! You won’t believe it but the circumference of the rim of a pint glass if straightened out is almost twice the height of the same pint glass (a pint glass is about a foot round and this ratio is a great one to score free beer in the pub as noone will believe you and you can get 4-5 packs of cards/ cigarettes underneath before your even close to level and people will be absolutely sure that it’s taller from table to rim than the glass is round!)

Where this comes into play is often when talking about how low a car looks some will argue that what wheels the car is on make a difference to the arch gap however as the overall wheel size and tyre size should be the same on all the cars it actually doesn’t effect that only appears to. If you let this stray to much your speedometer accuracy can be impacted by several miles an hour and you could pick up a ticket you weren’t expecting! It also effects your milometer and will throw that out as well.
So now we’ve cleared up why it’s important we need to cover that the 55 isn’t actually a dimension at all! It’s a ratio and in this instance it means the side wall height is 55% of the width of the tyre. Be aware a 150/55 will have a much smaller side wall than a 250/55 and as such you need to do the maths for your original tyre to work out the side wall height and then reverse engineer the formula to get a percentage to the new tyre width your using. It’s unfortunately not and never can be 100% accurate as if you are using stretch some of the side wall is sloped and so won’t give a full height to the tyre but the difference should be minimal.
So lets run through a worked example for that gen 3 16-17″ wheel swap we looked at in the first article…
the oem wheel on the gen 3 is a 16j 6 and the tyre is 195/55 R16 91V
in the last article we looked at swapping that to 17j 7.5 so we need a tyre to fit,
the first bit is easy as we’ll just want an R17 tyre with the same load and speed rating so we’re after XXX/XX R17 91V
Now the tyre width bit can be a touch odd as various tyre widths have various rim widths they can be mounted on according to the manufacturers guidance. the stock rim at 6″ is 152.4mm wide, the new rim at 7.5″ is 190.5mm. now I’m not saying that you can mount the same 190mm tyre onto the 7.5″ rim (you’d need to check the manufacturers literature) and it would have a more stretched look but it will make the example a bit easier to see first pass through if we use that for a basis.
55% of 190 is 104.5 we are taking 25.4mm (the equivalent of an inch) out of the tyre holes diameter as we added it into the wheels diameter in the change from 16″-17″. this means we need to take 12.2 (half the change as it comes off each side of the tyre wall on opposite sides) so we want a 92.3mm side wall. 92.3 is 48.5% of 190mm and so we really want a 190/48.5 but I can tell you without looking that doesn’t exist so we go to the nearest 5% and we’d be looking for a 190/50 to hit the mark.
So we would theoretically want a 190/50 R17 91V, as I’ve dumbed down the calculation that is likely to be a pretty weird fit but it hopefully makes the example understandable!
Now we have a tyre size to suit our new wheels we can search any number of sites to buy these. Be aware though that once you have a size you may find those tyres are really expensive! This is due to the fact that there are more common and less common tyre sizes and this has an impact on price. So it’s worth occasionally tweaking the width/ ratio numbers just to see what gives you the best price close to what you want and then double check how those numbers sit with your speedo.
Now with all that explained I’ll point you in the direction of a really handy little website…
www.willtheyfit.com is a great website that allows you to punch in the size of the wheel and tyre combination you are currently running and what you are looking to move to and it will give you a break down of what the change does to how far in the wheel goes to the wheel well, how much further out it comes, what variation it gives to your speedo + or – and various other things as well as a visual representation of how the wheels compare. I’ve plugged in the above numbers and you can see how horrible sticking to the 190 would be but you can see that the over all Diameter hasn’t changed.
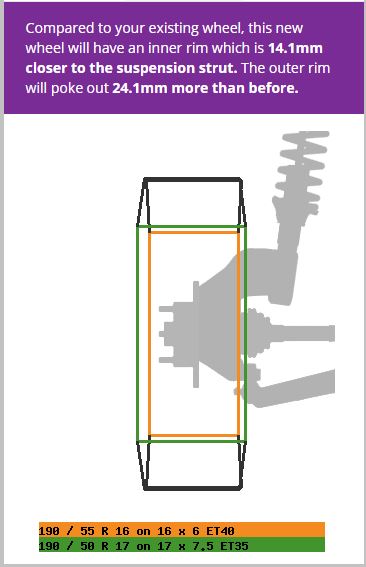
It’s a really useful tool and well worth a look even if it’s just to understand how adjusting the numbers explained above and last time affect the wheel on the car.
We hope you found this useful and look forward to seeing those incredible fitment pictures on the club pages soon!!!

