Are you sick of having a huge arch gap over you wheels?
Want this…. To look like this….


Let’s look at how!
So your probably used to this by now but here’s the classic disclaimer!
All work done on your vehicle is undertaken at your own risk, the writer and Cube owners club accept no liability for any damage or injury sustained whilst carry out or as a result of the works described in this guide.
Now on with the interesting bit!
So first things first you are going to need
- Axle stands
- Jack (a long reach low profile one is best but what you have will likely work)
- Wheel brace
- Torque wrenches (your choice really but I like to know everything is tight and the tops of the shocks can be over tightened I believe)
- Selection of sockets and extensions. (you’ll need extensions to reach 2 of the top strut nuts)
- 17mm ring spanner
- Allen keys
- The all important spring compressors
- Thread lock
- A set of replacement springs – Eibach sport lines are used here but others are available.
- Flat head screw driver (for undoing clips)
- Release agent (I use WD-40 professional penetrating oil available from screw-fix but others are available such as plusgas)
- Rattle gun (not essential but if you can lay your hands on one it will probably make life easier cracking some of the rustier connections!)
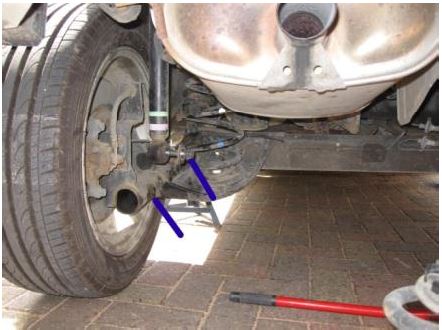
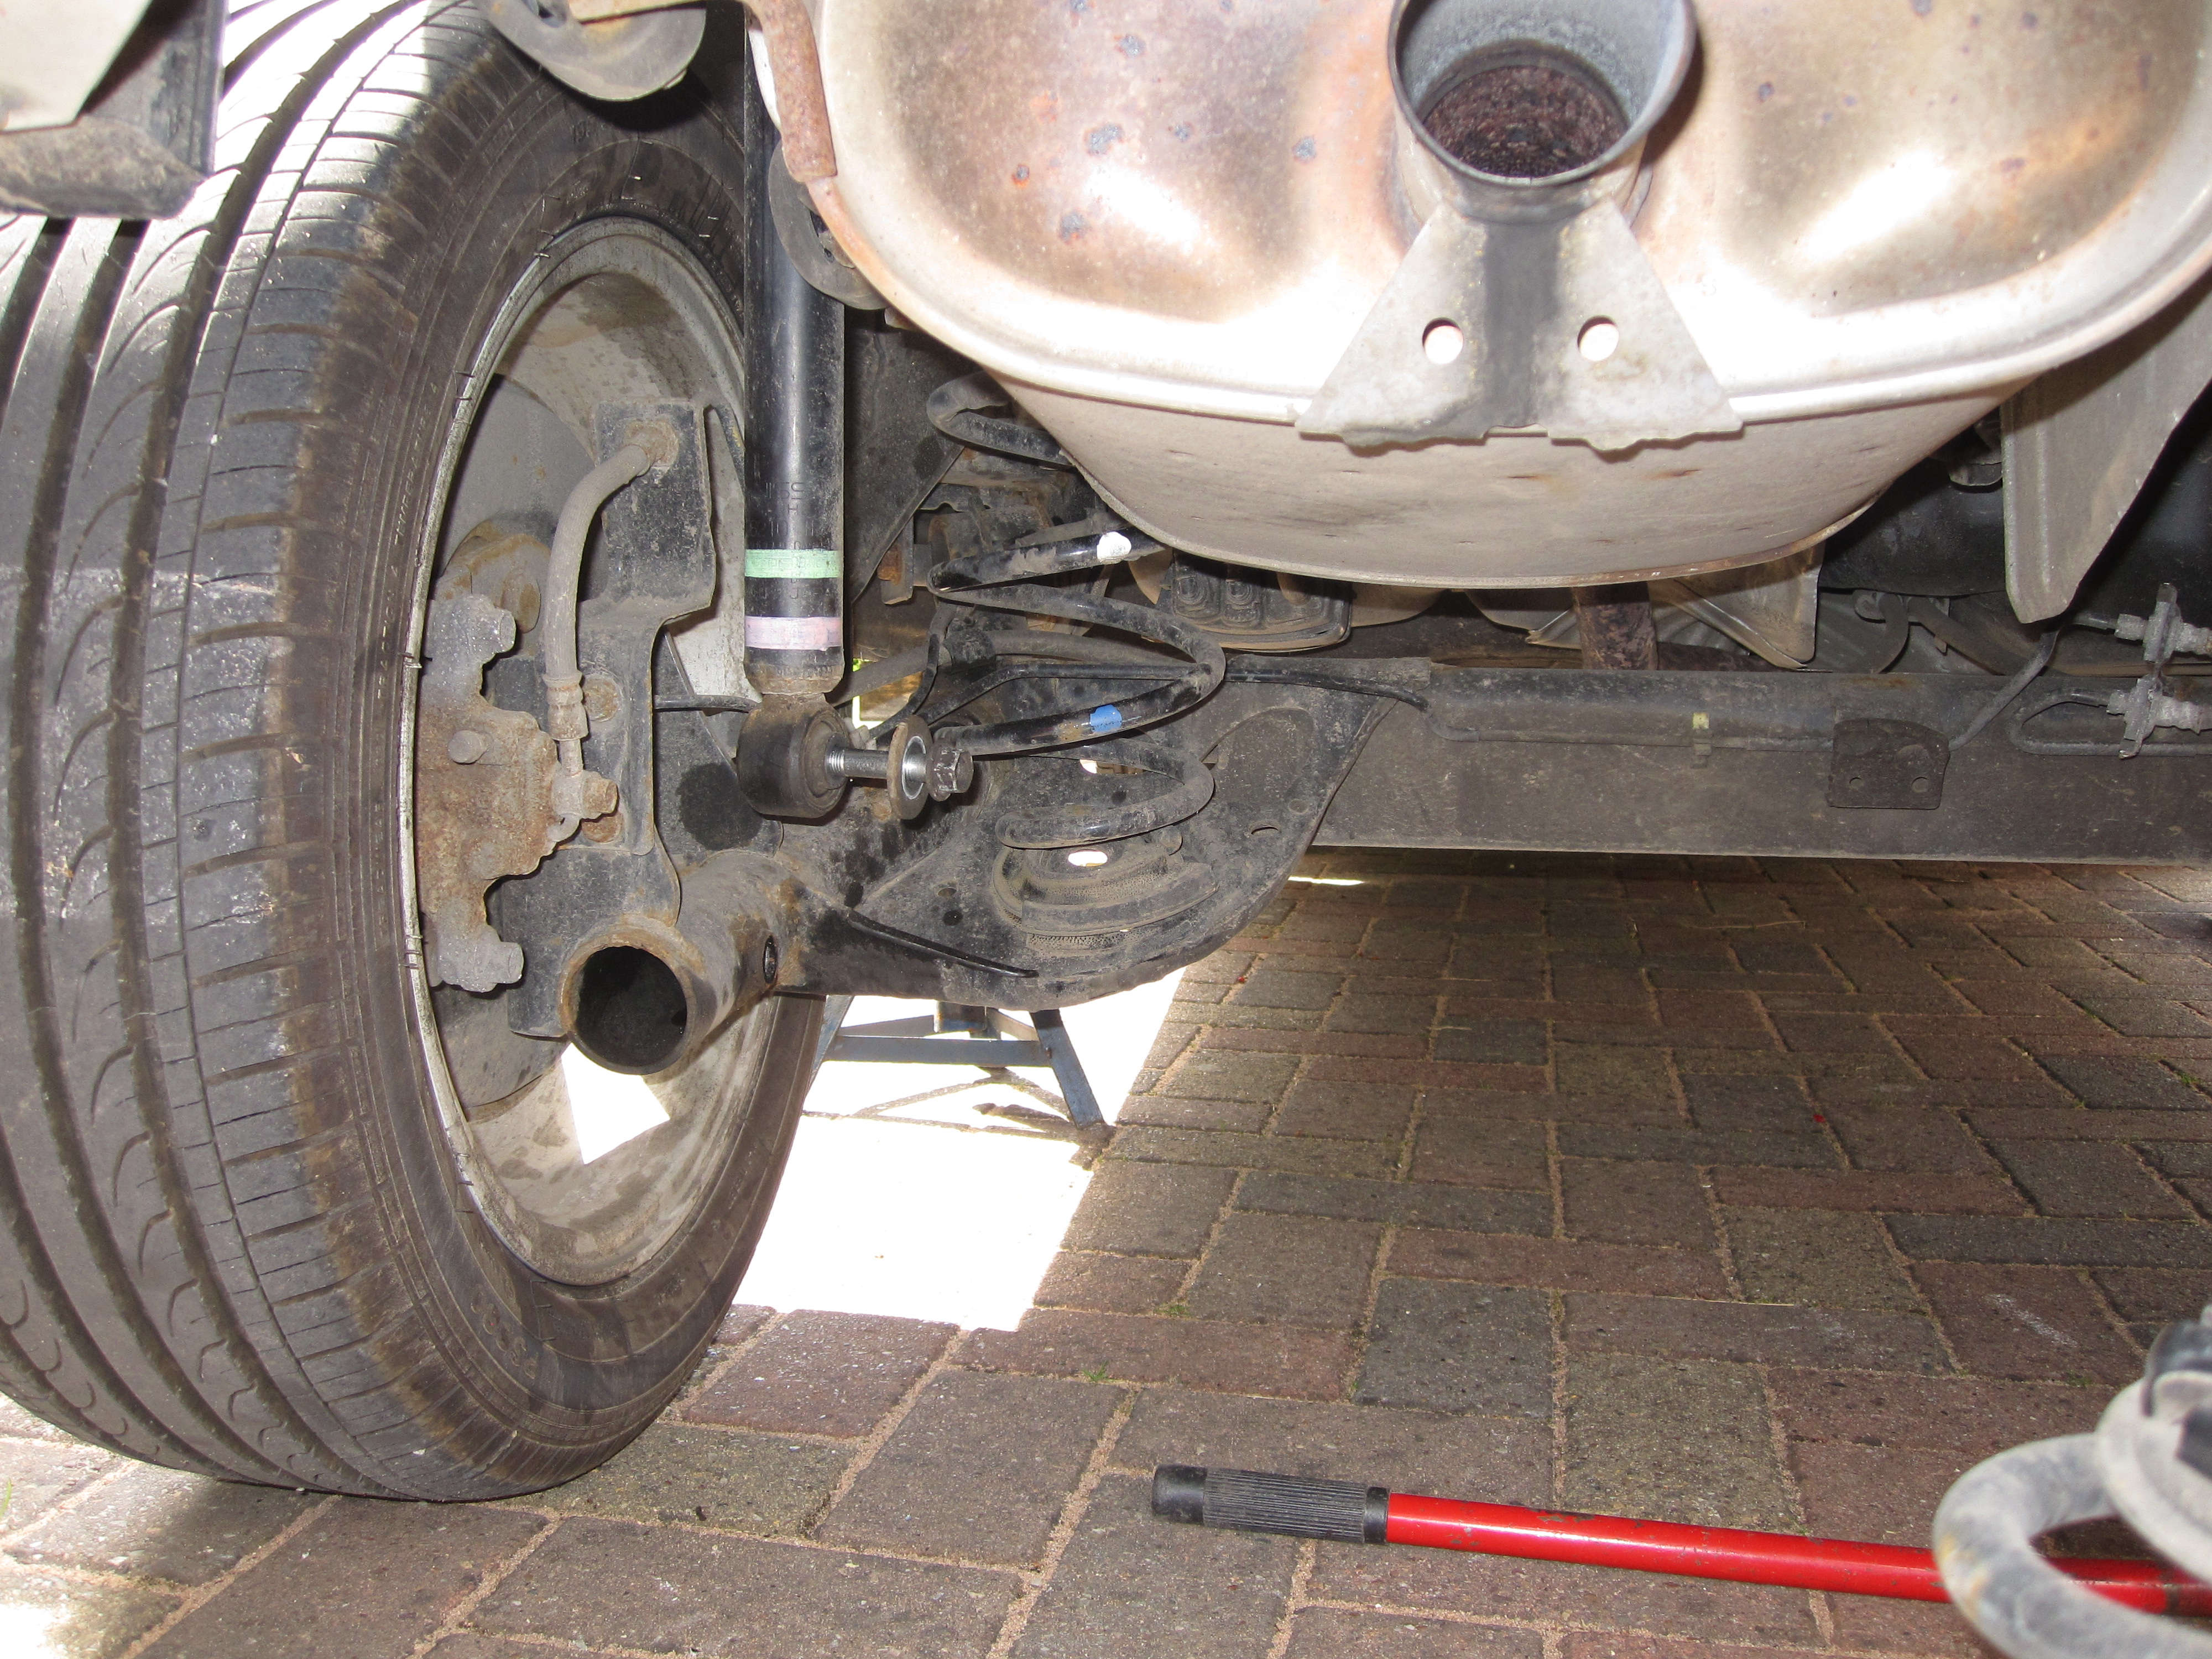
Blast the damper top nuts and the pair of lower wishbone connection bolts at the front each side and the lower damper connection bolts either side at the rear with penetrating fluid a few days before you intend to work and then the morning of the job. This is advisable as everything can get a bit stuck with the dreaded Japanese super glue… rust! The points marked with blue are the locations to spray, the rear was already undone when the picture was taken but you can see the oil in the shot!

This work can be done on your own but as you’re going to have the car in the air and some of the tasks involve a reasonable weight (nothing to heavy but you don’t want to drop a break disc and have it slam into the concrete!) also it helps with getting the car onto stands so it doesn’t slip or bend a cill seem!
First task is getting the car in the air. I’d advise you start with the front; it’s the larger part of the work and also has the more bolts and nuts to have seized and make you have to stop! Make sure the car is chocked at the rear and the axle stands are ready to slot under the car.
As you’ll be taking off the wheels don’t forget to crack the wheel nuts as this won’t be possible once the car is off the ground.
The front jack point is a fair way back in the centre of the car and can be spotted as it has a hole that goes through to a bolt location. Bang a bit of wood between the jack and the hole (you don’t want the trolley jack point disappearing into the hole after all!) and start jacking.

Once the car is in the air get the wheels off and you’ll see everything you’ve got to take apart!
Don’t back out now though, firstly get the brake parts out the way by removing the clips below and carefully moving the cable and hose aside. These are the brake line and ABS sensor connection so go steady with them as you don’t want them damaged. A flat head screwdriver helps free them and they’ll slide off easily.

Next it’s time to crack all those nuts you sprayed before. Hopefully the spraying has helped although a rerasonable length breaker bar or rattle gun can help here if the nuts are stubborn. As a last resort you can use heat and this may become more necessary the older these cars get.
The drop link has a nut on the back side to allow it to be held when you undo it so it doesn’t just spin so slip a spanner in behind to hold it.


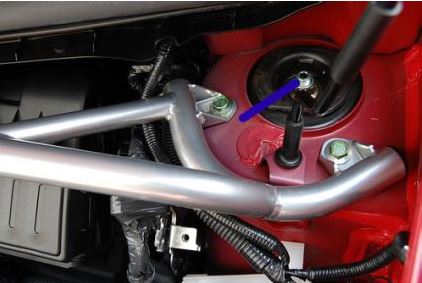
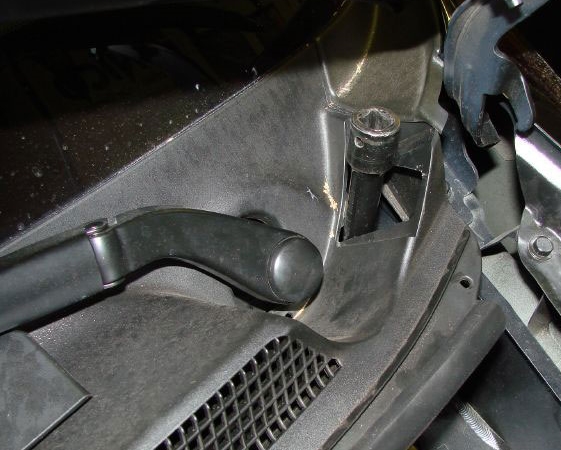
Once the wheel hub has been lowered safely onto the ground it’s time to move to the top of the strut. There are 3 bolts each side. 2 are visible in the engine bay and the third is below a little removable panel on the windscreen cowl. The front remove easily the rear you will either need a magnetic socket or, as I use, put the socket into the finger of a rubber glove as that takes out the tolerance and holds the nut nicely!

This will release the strut from the car and you’re ready to get the spring swapped.
THIS IS WHERE YOU NEED TO BE MOST CAREFUL AS THESE THINGS ARE UNDER PRELOADED COMPRESSION AND SO JUST UNDOING THE BOLT WILL FIRE THE STRUT THROUGH WHATEVER IT’S POINTED AT!
Having said that these aren’t the most preloaded in the world so don’t be scared by the warning!
Apply the spring compressors equally round the coil and compress each one a little at a time working around until the spring is no longer touching the top and bottom plates. Once compressed remove the damper by undoing the nut at the top you sprayed earlier. This is done in the workshop manual using a spanner and allen key as shown. This didn’t want to happen for us and so we used a rattle gun! There is mixed advise about the suitability of doing this and its effect on dampers so it’s your choice if you want to use a gun but I’ve had no issues.

Once the spring is off the damper slowly undo the compressors working around the coil undoing gradually the same way you did them up. Swap them onto the new coil and compress those enough to put them on the damper again with a loose fit. Put the spring over the damper and now you need to make a few alignments, the spring needs to be seated in the step on the damper and the top cap needs to be orientated to the base. Screw the top cap down finger tight making sure you align the top plate correctly to the bottom of the damper and back off the spring compressors. Now torque up the top nut to 68Nm (6.9kgm – 50ftlb)
You’ll end up with this…

Now re-install in the reverse of removal adding a drop of threadlock to each thread as you tighten them up. The torque settings for installation are
Top cap bolts (engine bay and windscreen scuttle) – 16Nm (1.6kgm – 12 ftlb)
Drop link – 37Nm (3.8kgm, 27ftlb)
Wishbone bolts – 165Nm (17kgm – 122ftlb).
TOP TIP TIME – If like us you don’t have a long reach or low profile jack it might be advisable to put a paving slab or block under the front wheels when lowering as we found that the jack wasn’t removable once the car was lowered! You can then either drive off them or jack slightly at the side and remove the blocks as the jack isn’t all the way under the car!
The rear is much simpler as you don’t need the spring compressors! You don’t need to take the wheels off either!!! Jack the car using the rear axle and once on the stands lower the axle slightly to take the load off the dampers and remove the bottom bolts.
Continue to lower the axle steadily and the springs will fall out! Put the new springs in and slowly jack the rear axle back into place checking the springs are aligned until the damper bolt holes are aligned with the axle and then do them back up with a touch of thread lock and torque these to 124Nm (13kgm – 91ftlb). Bet you never thought after the front the rear would be sooooo simple!
Put the car back on the floor and take it for a run to check everything is as it should be, There should be no weird noises from general driving although be aware lowering can increase general road noise as the springs themselves are stiffer.
As a final step it’s worth getting the tracking done. That isn’t a DIY job but having monkeyed about with all the suspension it’s sensible to check it’s all straight. Mine hadn’t moved anymore then it would after having been driven normally but it’s good practise!
Now go for a ride and enjoy!
Happy Cubing!!!
