So the being unable to open the back door of a gen 3 and being an MOT fail reared it’s ugly head on the face book group recently and after I gave a quick write up David Joy ran with my words and got his car working again. As a bonus he took my words and added a whole heap of Photos and produced a write up bolstering my descriptions where he felt useful.

So lets see how it’s done…..
So your probably used to this by now but our classic disclaimer has a little twist this time
All work done on your vehicle is undertaken at your own risk, the writer and Cube owners club (and this time David as well!) accept no liability for any damage or injury sustained whilst carry out or as a result of the works described in this guide. This guide however is evidence it can be done with a bit of patience and taking your time.
So first things first you are going to need
- Torx bit allen keys
- Cross head screw driver
- Spanners or sockets
- Epoxy putty
Before you start this, please remember that you will need to do this overnight and you will not be able to lock the door. David parked his tight against a wall and secured the door with a bungee cord whilst I parked it close to the garage so the door couldn’t be opened.
So the problem with the door not opening seems to be tied to the cable sleeve that holds the cable going to the outside handle enters the lock unit there is a little white plastic retainer and this breaks. being broken means tension is lost and the handle stops working.

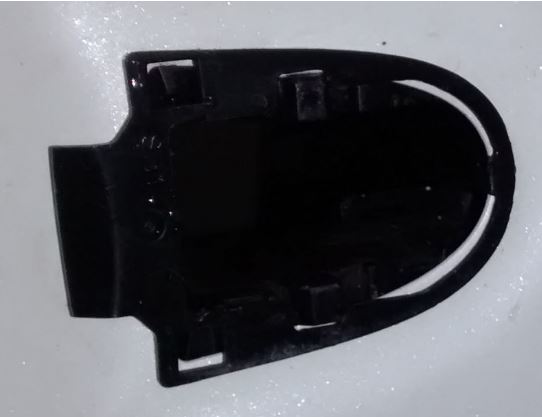
First point to get the lock apart is to remove the little black bung in the end of the door and undo the Torx head screw in there.

This allows removal of the door handle finisher but I found I needed to give the screw a little tug to free it. Make sure you have a good quality Torx bit as David managed to round his off with a cheap one and had to drill it out and replace.
The screw is retained and won’t fall out so no need to worry about it dropping in the door. Once completely loosened and tugged back the finisher should pull clear of the door and if it doesn’t you haven’t pulled back the screw far enough.

Next you will need to slide the handle backwards so it looks like this, there is a slight notch feel as it’s drawn back and this is it disengaging from the lock inside.

From here you can pull the handle out and it and remove it. There will be two plastic gaskets around the holes in the door that need to be pulled out. They are flexible enough to not be difficult but be gentle as with age I can imagine these perishing and becoming brittle.
Next, remove the door card from inside starting with two screws, one in the handle and one in the ripple hook holder.


Give a sharp tug at the bottom of the door card and it will come away. Do this around the door card until loose then lift up gently. Remember to unclip the electric window controls and put the door card somewhere safe and clean (the back seats work or take it indoors.

Next, peel back the clear plastic cover sheet carefully at the rear of the door to expose the large opening. Remove the internal handle by unscrewing the bolt underneath the handle (yellow highlighted) and sliding the unit to the rear of the door.

Unhook the cable from the internal handle and set aside somewhere safe as well.

Take the 3 bolts out of the lock case on the back of the door (Shown removed here)

The lock should now be free to move in the door but you won’t get it out as the window guide is in the way. Both David and I moved it by removing the bottom bolt and gently flexing it enough to get the lock unit past.

If it’s still too tricky to remove then remove the top bolt too but be careful as this may allow the window glass to drop so be careful.

Unplug the central locking cables by pushing the little clip at the bottom of the plug.

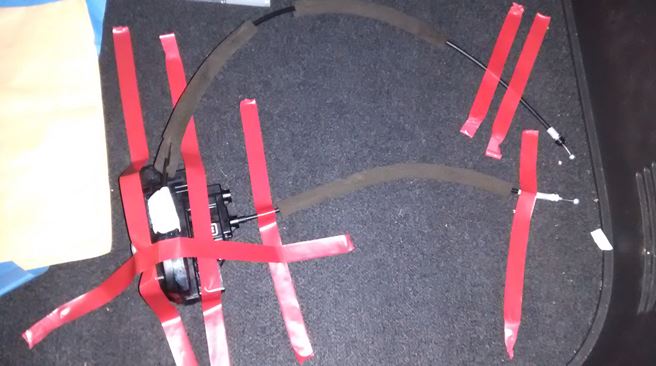
The cable that needs the fix is still hooked to the lever unit you slid the door handle out of and this slides out the holes the door handle was attached through and can be brought out as well as one whole unit before having the second cable ball removed and you having the lock free to work on. Take the unit in the house and push the sleeve all the way into the lock housing so it is seated correctly, make sure the cable is following the correct arc away from the unit as shown.


Surround the area, behind and on top, with a good thick lump of the putty. now this needs to be solid enough that the cable won’t push through it. I’m sure there is a point where it would be too much but I’d be happy to see you can’t be generous enough with it!


You really, really have to make sure you leave it to set truly solid before reassembly so a good overnight to 24hrs is needed before reassembly. I tried to reassemble mine at the just hard time on the epoxy which wasn’t truly cured and it broke so trust us on this one! David taped his in position to make sure it didn’t move but even he says that was probably overkill!
Then carefully reassemble in the reverse order. be gentle s you guide everything back to home and it’s a good idea I found to make the screwwing back in of the lock the last thing to do after reseating the cable in the outer handle housing as it allows you gently curve the cable round it’s required looped path. The only slightly tricky part on re-assembly is the ‘trigger’ that the door handle must sit behind but it’s quite easy to figure out.

Once your all back together give it a gentle test and fingers crossed your sorted. just do what I did and ask the MOT tester to go gently with it when it goes in for the test and all should be well.
Unfortunately, the cable for the external door goes through a huge loop to get to the right place and I believe it’s this loop and the pressure it causes that breaks the plastic. I have a sneaking suspicion that even if your locks haven’t yet broken it could well be a good idea to take the unit out and apply the putty to the intact unit as the putty could well offer enough support to the unit over time that this never actually becomes a problem for you.
I have a replacement unit from Japan to test fit if mine fails in the future but it is a slightly different design (2 cables run to the inner door handle rather than 1) so I am wary to pull mine out and check the fittings but the locking unit is of a far better design and doesn’t have the rubbish plastic cap and the cable section is exposed likely making it far more serviceable in the future.
Thanks to David for his help with the write up and let us know in the comments how you all get on!
